
This article refers to the address: http://
Flashlights, such household appliances, are not unfamiliar to everyone, but in the face of the same product in the market, a variety of products, do you think it is necessary to do something? Yes, let's take a look at this flashlight "small straight", Absolutely "only this one"! As a DIY party, you know ~
1 homemade flashlight tools and materials
â— Electric iron
â— Hand grinding
â— Utility knife
â—‹ 350 ohm resistor 1
â—‹ 1 IN4007 LED
â—‹ Silicone rubber and thermal curing adhesive
â—‹ AB glue
â—‹ 1WLED1
â—‹ 15 degree condenser lens 1
â—‹ 18650 lithium battery (to be charged with protection board) 1
â—‹ AMC7135 steady current chip 1
â—‹ One stainless steel tube with an inner diameter of 21mm
â—‹ 1 switch
â—‹ Heat shrinkable tube
â—‹ wire
2 Working principle
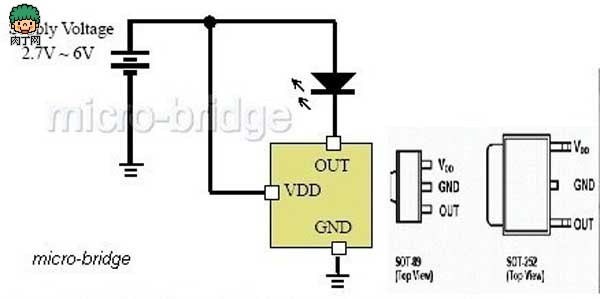
â— Circuits provided by manufacturers of 7135IC
â— Circuit diagram
3 welding current regulator chip and LED
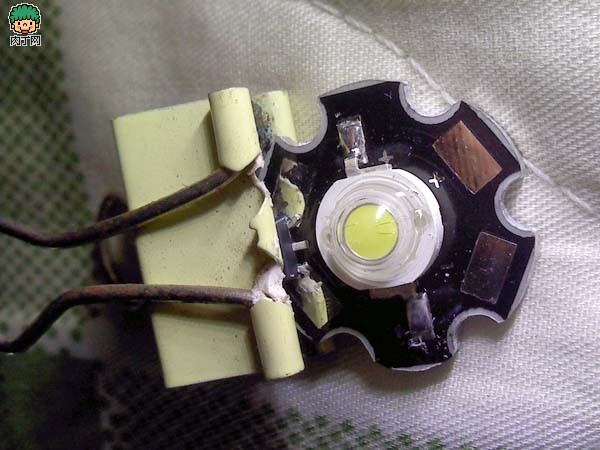
â— Place the 7135IC on the PCB side of the LED, clip it with the book clip and solder
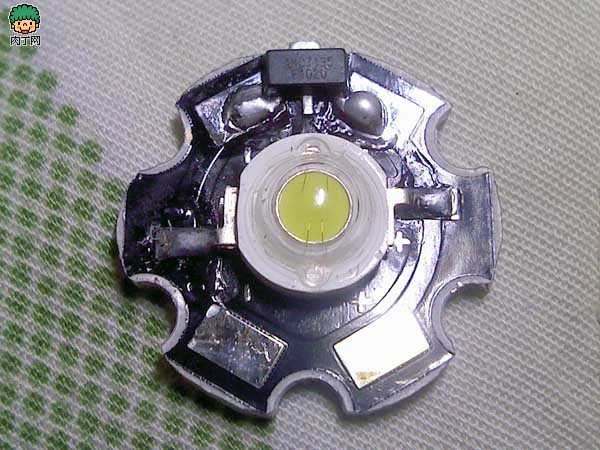
â— Good welding
4 wiring
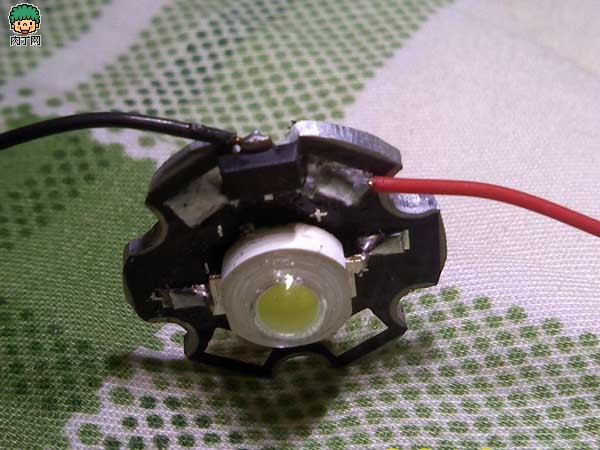
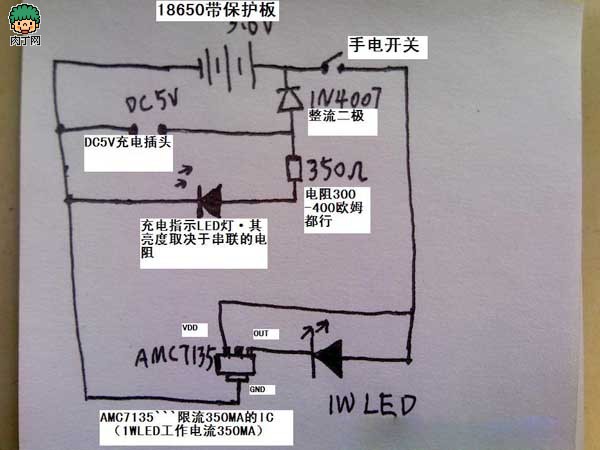
â— According to the description of the circuit diagram, the red line is connected to the LED positive pole, and the black line is connected to the GND pin of the 7135IC.
5 processing condenser lens
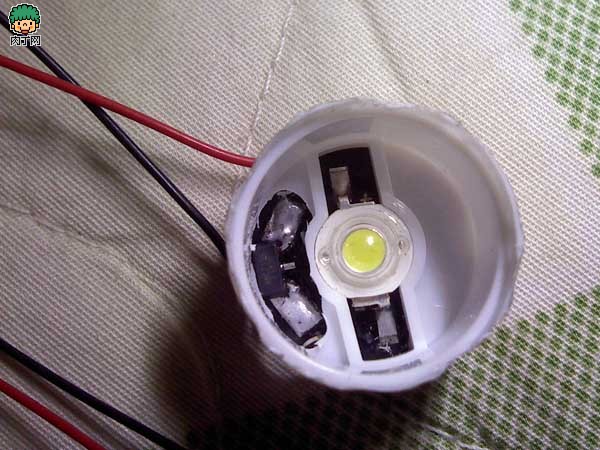
â— Install the LED
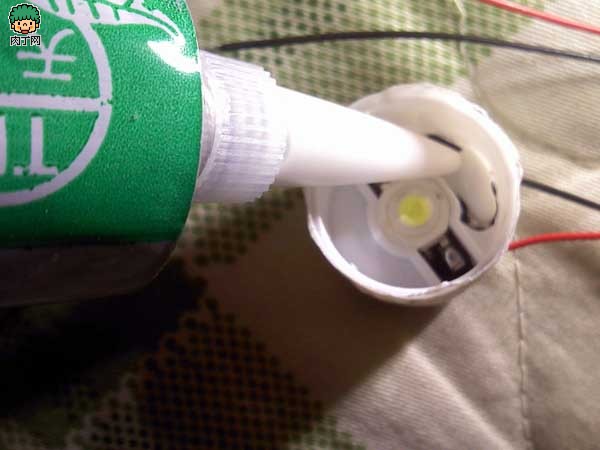
â— Apply silicone rubber to improve waterproof and dustproof performance
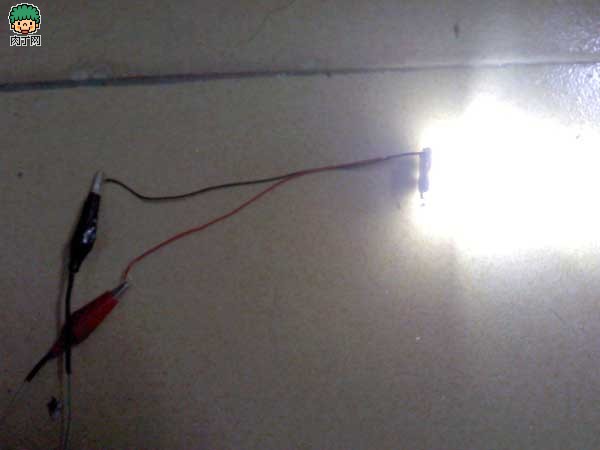
â— Install the lens lighting test, yes, bright
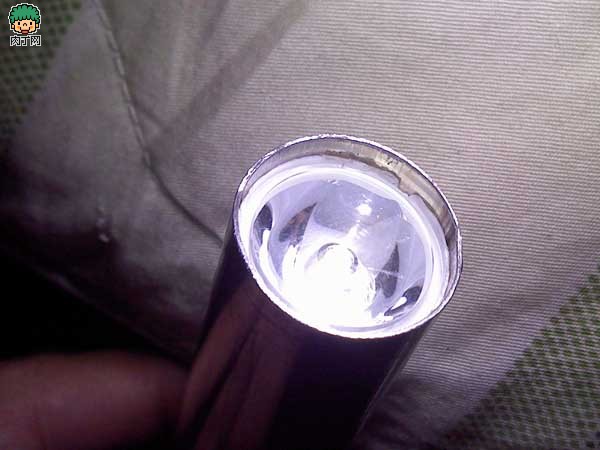
â— Mount the lens into a stainless steel tube
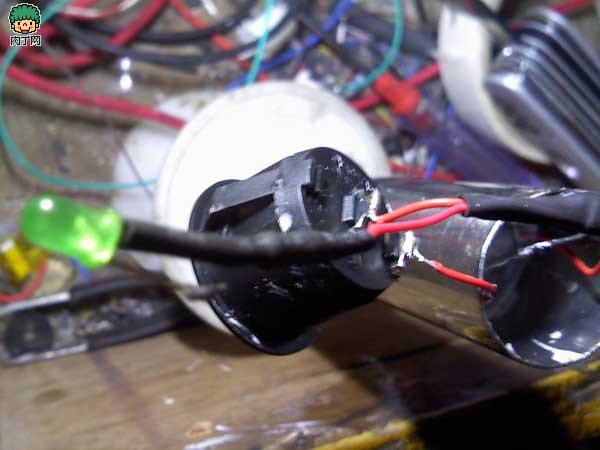
â— Pull the wire from the tail and pour the heat-cured silicone to transfer the heat of the LED to the stainless steel tube. 6 Install the battery.
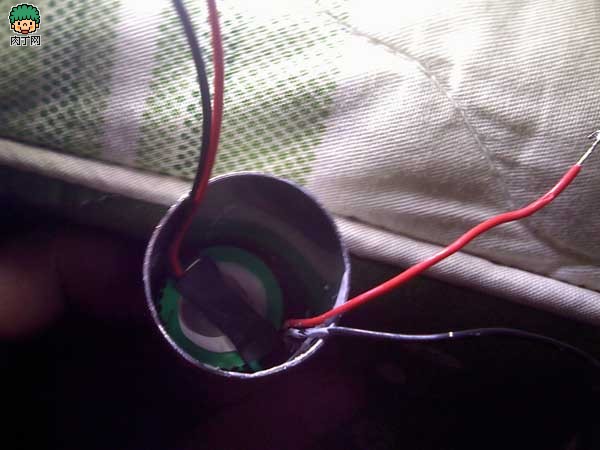
â— Install the battery and take out two wires at the negative pole of the battery
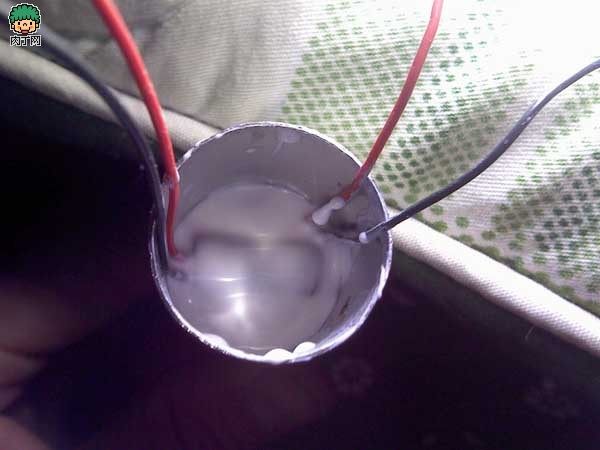
â— Invert the silicone rubber to fill the space between the battery and the stainless steel tube
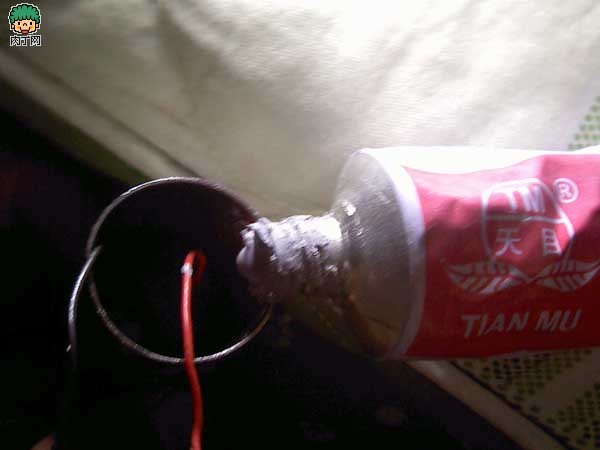
â— Connect the 2 negative wires to the negative pole of the charging socket
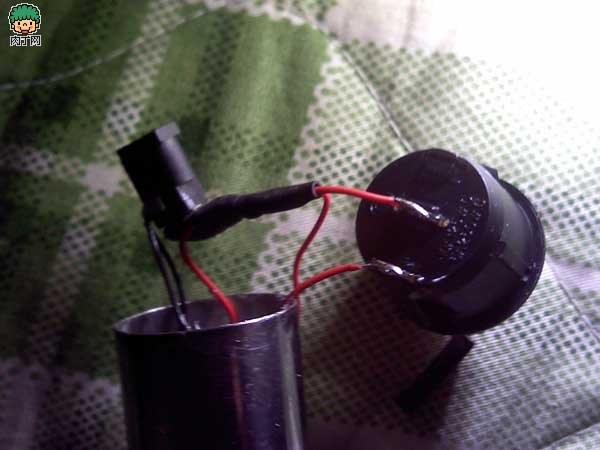
â— The positive pole of the charging socket is soldered to the diode, and then the thermal shrink tube is insulated. The positive line of the battery is connected to the output of the diode, and the other line is connected to the positive line of the charging socket.
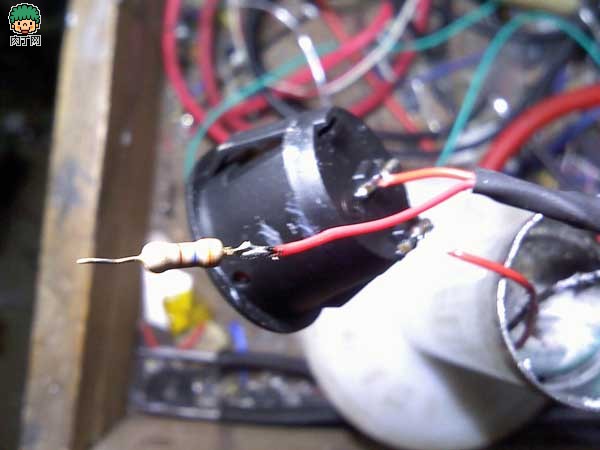
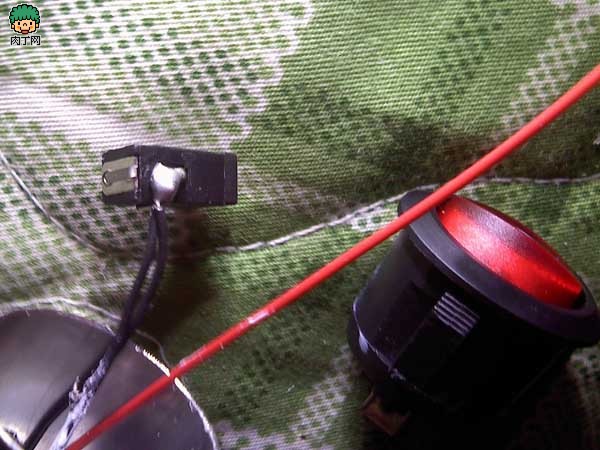
â— Connect a 350 ohm resistor to the positive output wire of the charging socket, put on the heat shrinkable tube, and stick the LED with the glue in the indicator light hole of the switch (the switch has the indicator light inside, and the original indicator light of the switch is removed. Drop it, just put it on. You can see the brightness of this LED through the translucent red shell of the switch when charging)
This switch has its own indicator light. Its function is to turn on the switch. This light will be on, but we don't need it as a flashlight, so we will connect the charging indicator on the other circuit to the position where the original switch is lit. Got it.
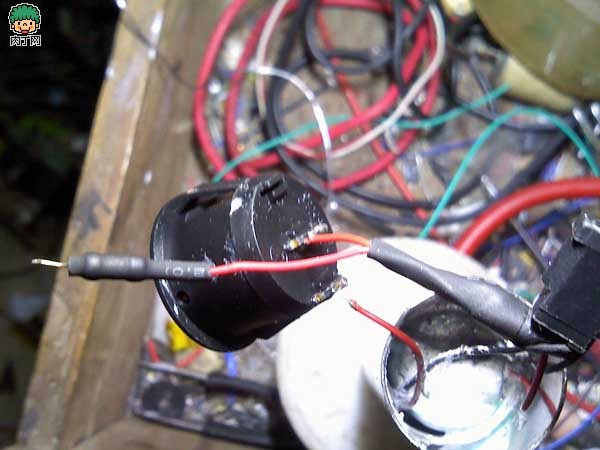
â— 1Wled's positive line is connected to the switch's free end, and the other end is connected to the battery's positive line.
â— Connect the other end of the resistor to the positive pole of the LED indicator and cover the heat-shrink tubing. Now all the wires are connected. Fix the charging hole before the charging socket is extended with AB glue. Finally, apply AB glue to the switch and press the stainless steel tube to wait for the glue to solidify.
7 test
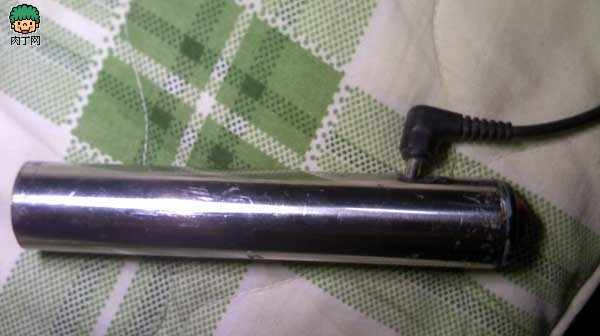
â— Charging

â— Switch when charging
â— The spot of 2 meters away. More round, huh, huh~ you're done!
Drum type Rice Cooker
Features
This type rice cooker is famous with drum type appearance, which is easy operation and easy clean.
There are two type of inner pot , one type called white pot which is without non-stick but cheaper price .another one called non-stick pot is polished with emery, Also there are two type non-stick with different price ,it`s depending on different demands to use.
And the inner pot cannot be burned on the stove, which will make the pot transfigured and bad contact with the heating plate. While cooking , the heating plate or the fuse is most likely to be burned for the bad contact of the inner pot and the heating plate, Besides, make sure to dry the pot before putting into the outer shell of the rice cooker ,or else the drops of water flowing on the heating plate, will make the heating plate rusted.
Applications
Many peoples are used drum type rice cooker for congee and soup, some of peoples are prefer to use this type rice cooker for steaming.
Drum Rice Cooker,Drum Shape Rice Cooker,Electric Drum Rice Cooker,Multifunctional Drum Rice Cooker
Guangzhou Taipeng Electrical Appliances Technology CO., LTD. , https://www.kettles.pl