Friendship reminder: A full 100 pictures, friends of the toilet, please carefully browse, I have long been a leg hemp or acne, I am not responsible.
I also discovered that the name of this lens is so long. Should be the product of 2010, Taobao on second-hand majority, about 800 yuan price up and down, there are also known as new, price 1350 yuan. I probably bought it at the end of 2011 at 1900+. At that time, because I was going to Japan for a self-help tour, I felt that 20 brocollis were more limited (because I didn't understand photography at all, I knew that telephoto looked far away, and there was no concept of aperture). However, when I went to Akihabara, I saw that all the Friends of the Eight Immortals really sold more than Amoy precious, haha.
I really found some pictures taken with this lens. I must say that the previous photography technology was really bad and I couldn't stand it anymore.

This is one of the few that can be singled out for everyone to spray lightly...

Plumeria.

Dogs living on the beach are happy. Have the opportunity to take the dog to the sea in the south (in fact, Sanya).
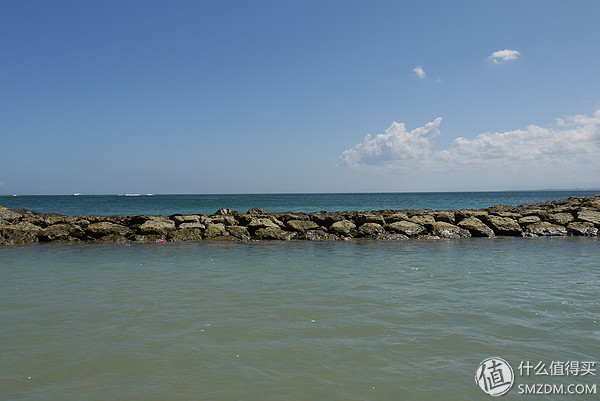
This ... is the scene of the accident and the last photo taken before falling into the sea.
Yes, it fell into the sea with the white GF1 body. Afterwards, I tried to save the fuselage. I completely took out pure water for two days, and then I was drying in the sun for two days (in late May). After installing it, I was able to boot up and the LCD screen could be seen. The photo was replayed, but it was also opened, and then it could not be opened again. I didn't handle this lens at the time. I could hear the rustling sound of the rustling and the resistance was getting bigger. The lenses on the lens were colorful... I thought I was definitely scrapped. Just put it in the bookcase for more than two years and itched it a few days ago and decided to take a closer look. (Anyway, it has already been scrapped. Even if it is dismantled, it doesn't matter if it is not removed.) The online search for lens dismantling posts is really not much, the same section of the lens is even less, the information that can refer to is very limited, had no choice but to touch the river. The result was so fumbling, it was completely opened, and it was successfully installed and restored. After the restoration, it was installed on the fuselage and tried it. It could still be used! You can use my God! However, because the lenses have been wiped by me, the coating is definitely not there. The quality of the image cannot be guaranteed. At the time, I didn't take any pictures. So today I will take another photo and take a photo to show everyone the internal structure of the zoom lens. (Amount, seriously overdone, took more than 130 photos, the upload limit can not exceed 100 ...)

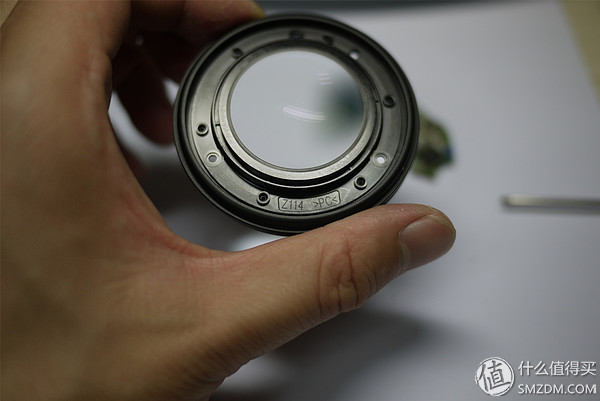
First on the standard image.

Turn over and look again.

Made in Japan, advanced products.

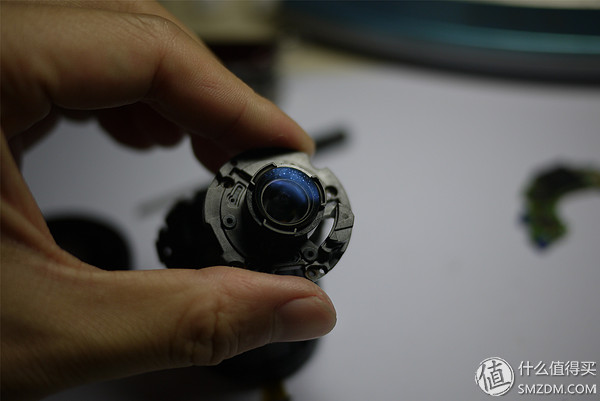
It was wiped when it was last dismantled, so it didn't look too dirty. When you just got out of the sea...

Metal chrysanthemum. Can faintly see the color blocks on the lens.

The tools used this time are really simple, but they also do their work.
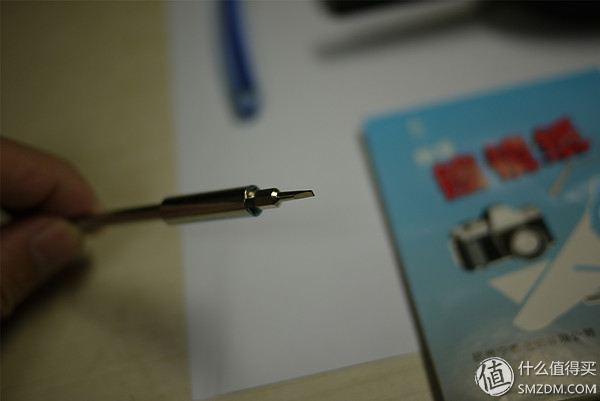
A sub-batch (forget the number) + extension bar. The handle was bitten by the dog... The function of this tool was revealed later...
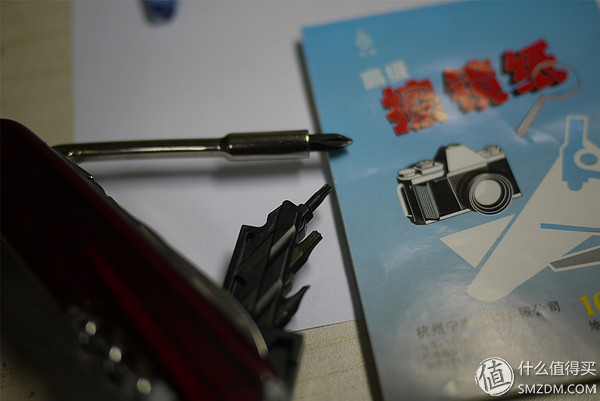
Saber's batch.
It looks like this one. Bits are indeed the most commonly used feature.

Preparation, personal habits in the demolition of this screw and small parts of more equipment, cut some small pieces of paper, you can follow the steps to wrap the screws, and the serial number on the table, so as not to install a large pile of screws And parts... (I'm not willing to tell you to buy a tool box...)

like this.

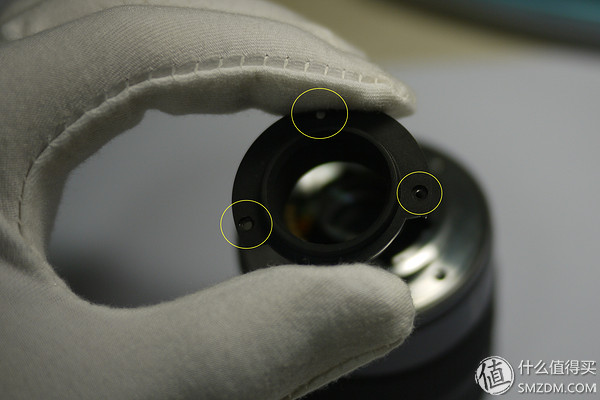
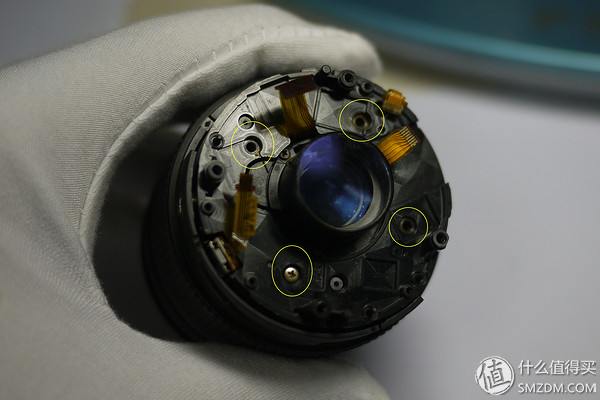
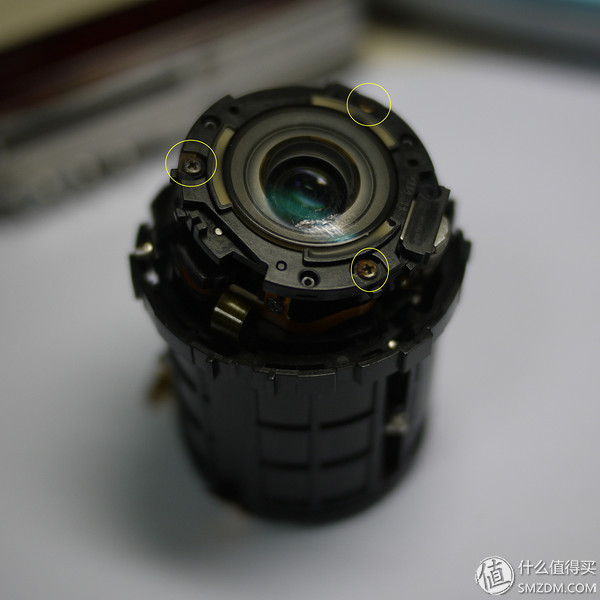
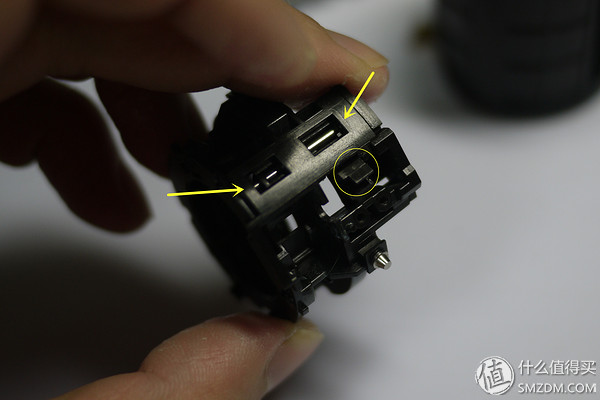
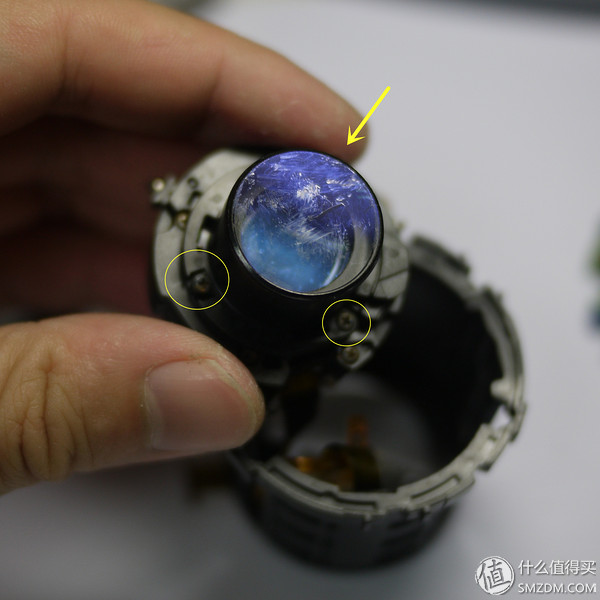
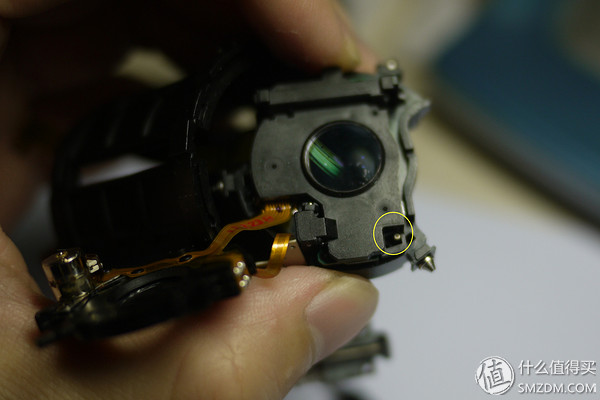
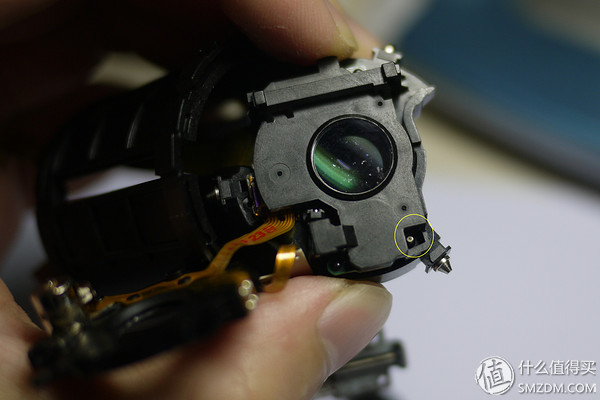
First remove the two small screws on the side of the chrysanthemum. Marked with a yellow circle.

Carefully wrapped. Here I have removed the third step screw in advance...
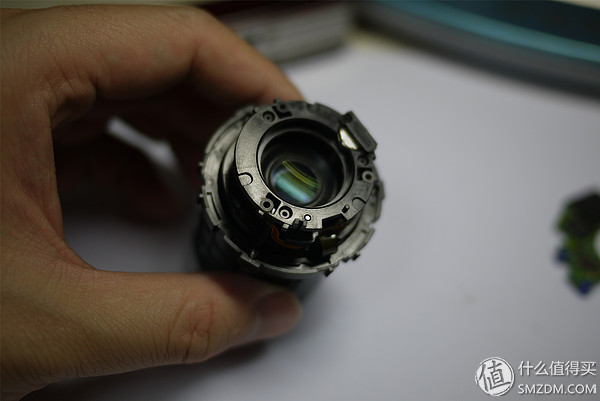
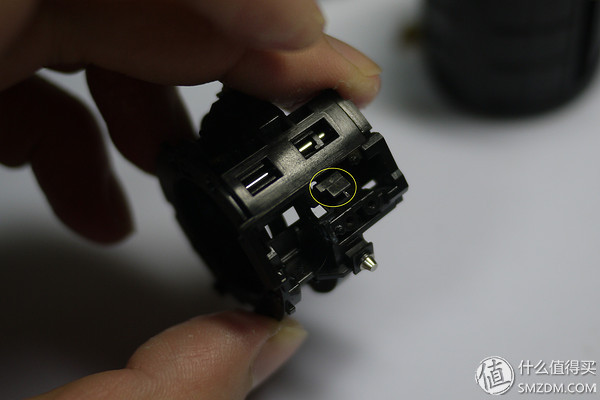
In the second step, remove the plastic ring. Many structures I do not know the exact name, welcome to point out.
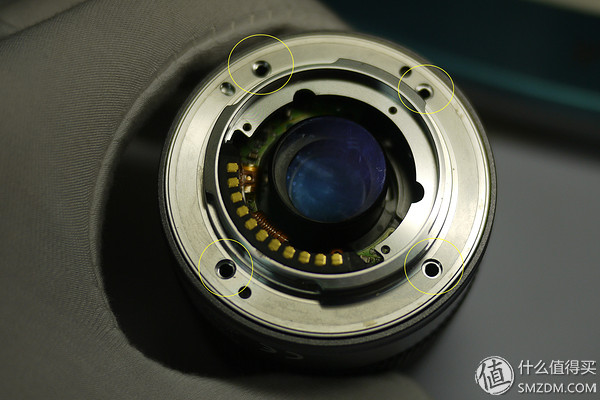
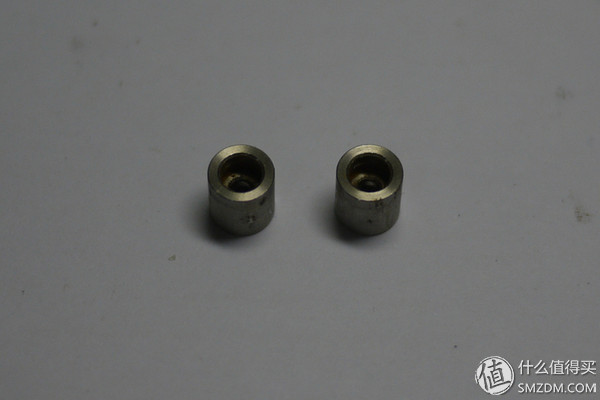
The third step is to remove the metal snap ring. I just removed the four screws in advance.
Use traces lightly. This lens is bought back all year round on the fuselage, snubbed 20 cakes...

No trace of rust, it is none other than 304...

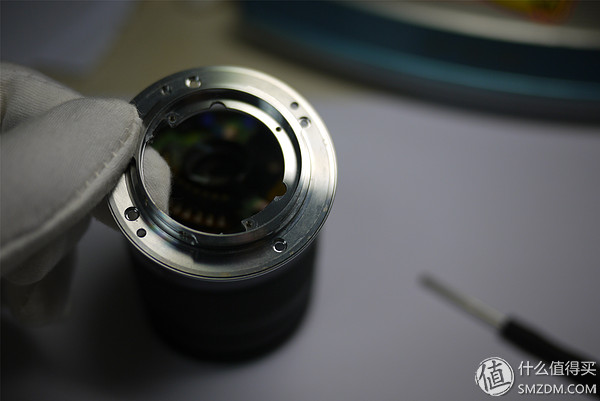
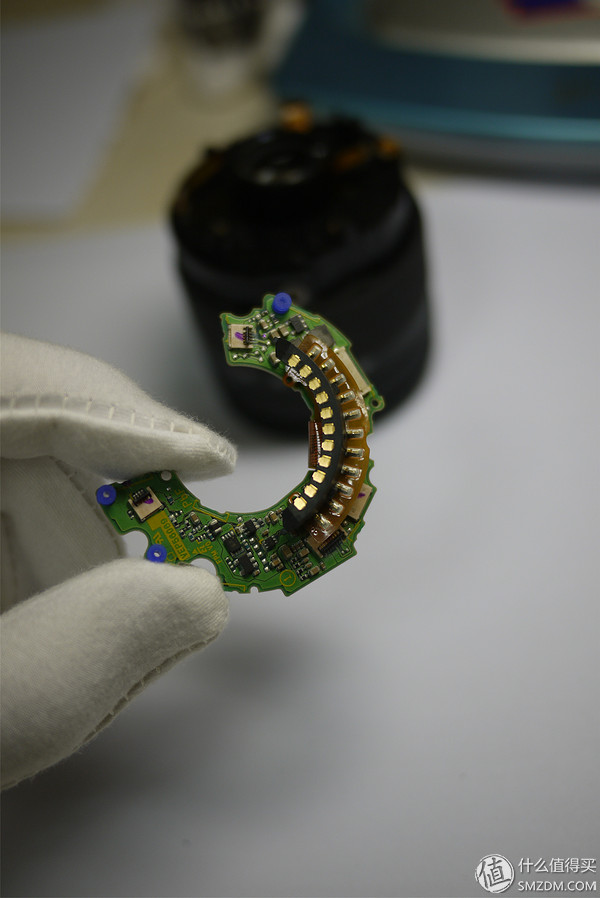
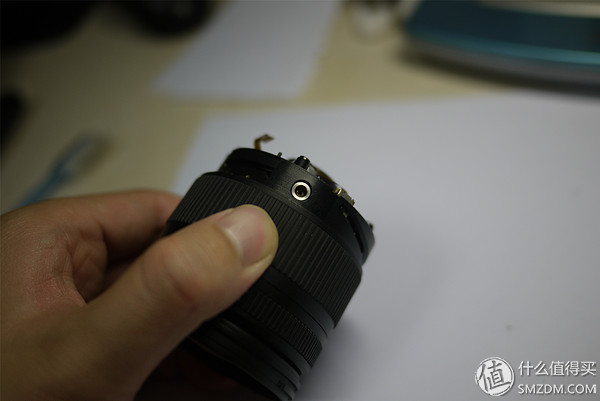
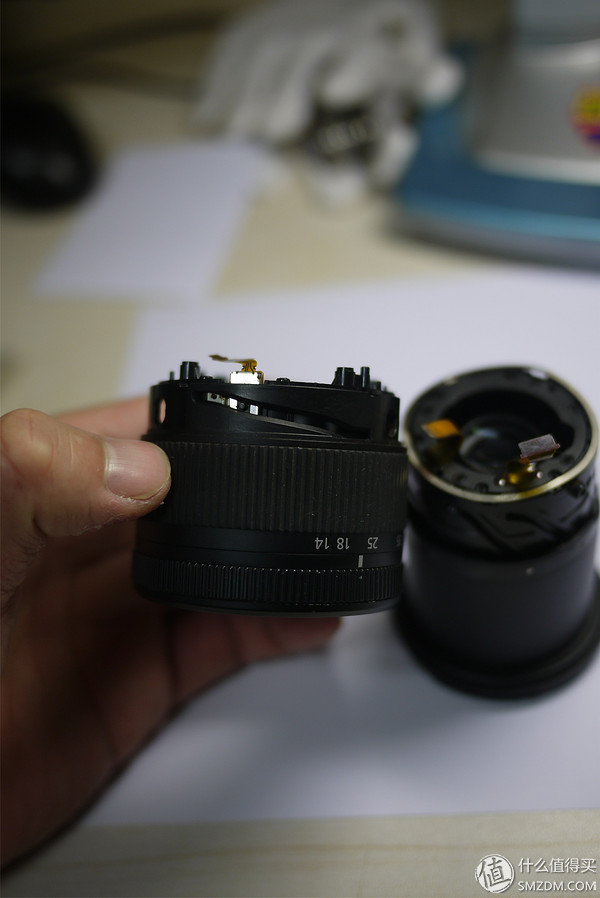
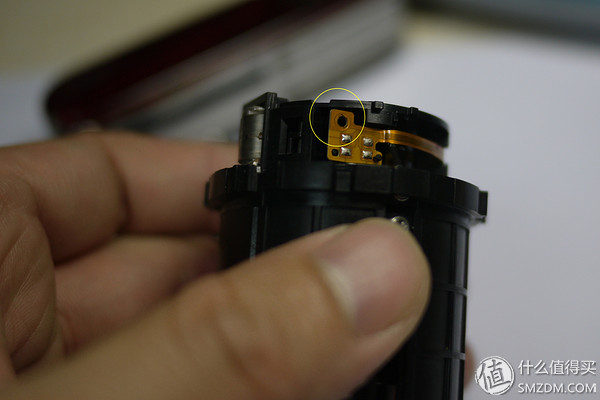
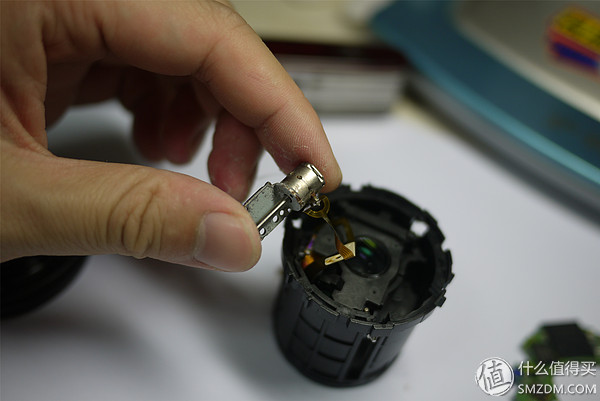
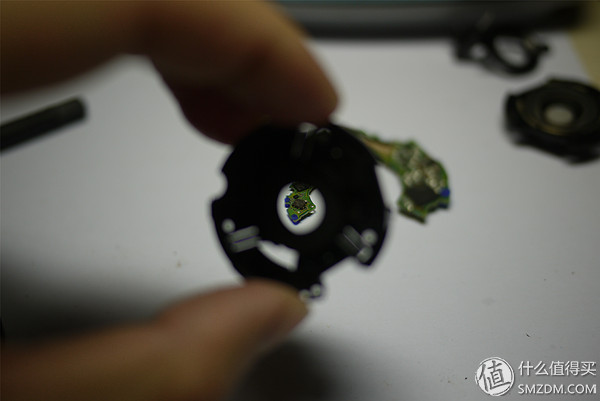
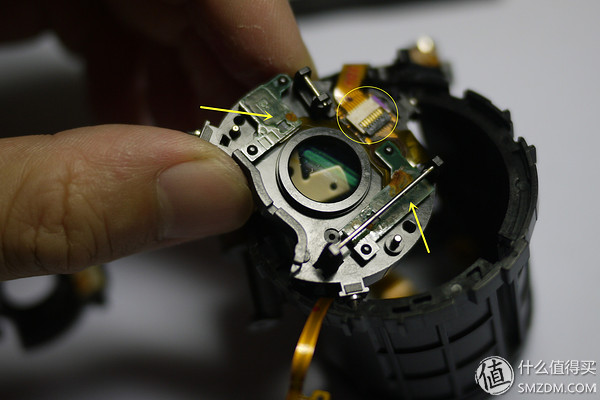
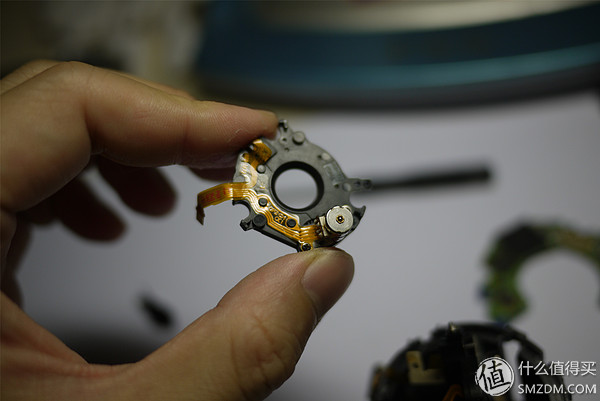
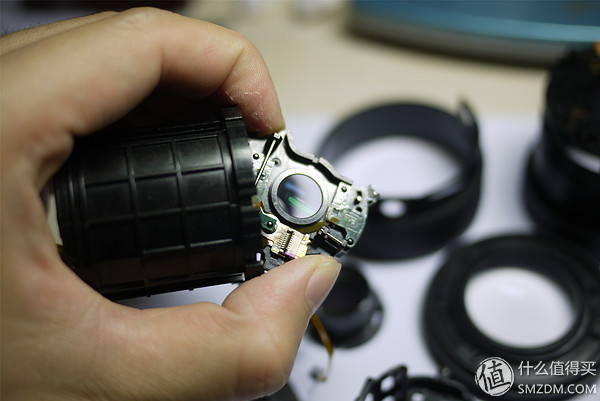
Then you can see the lens circuit board. We first removed this part of the plastic housing, four screws and a cable interface.
Got it down.

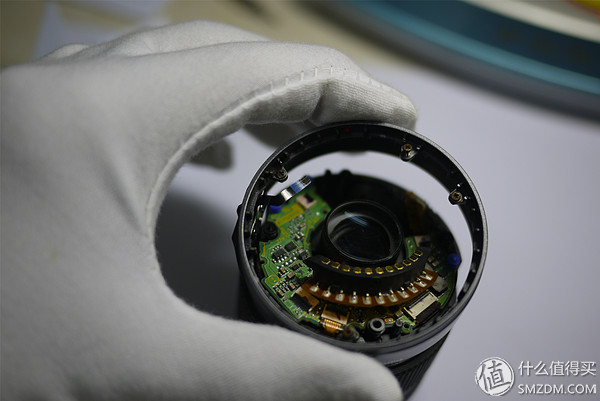
The cable connection is the OIS anti-shake switch.
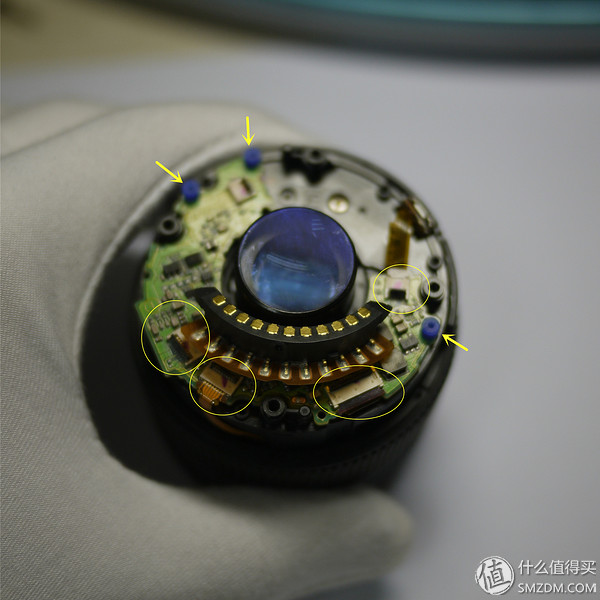
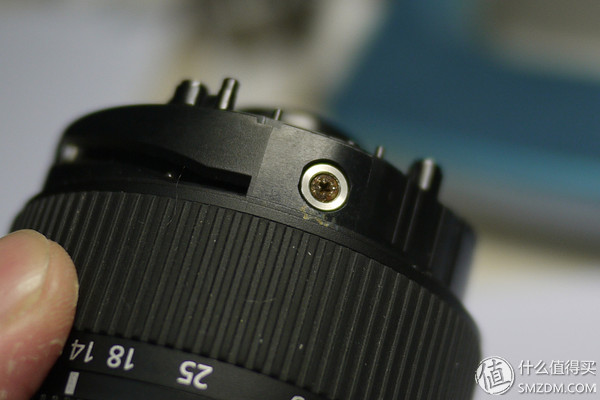
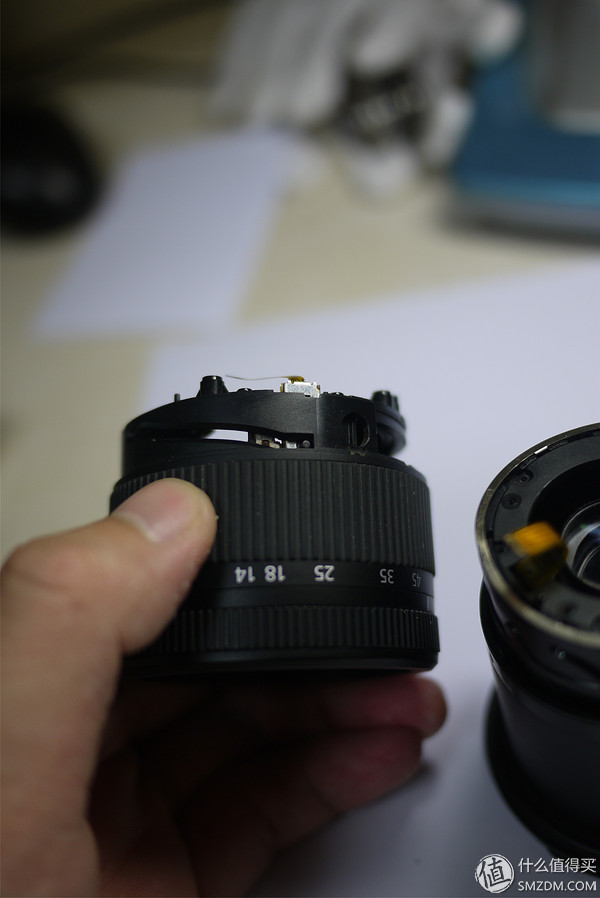
The circuit board is fixed on the lens with three blue rubber pads (yellow arrows), this part of the cable is more, carefully...

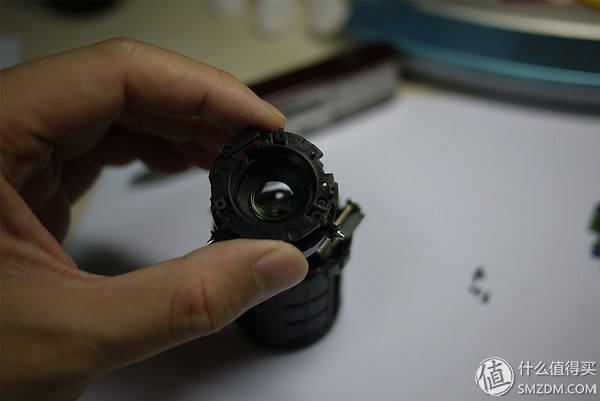
Remove it upwards.
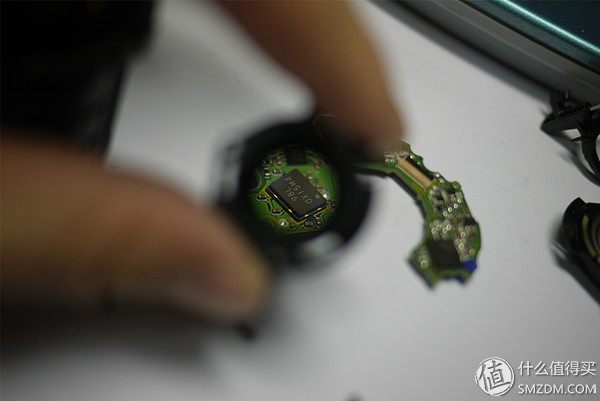
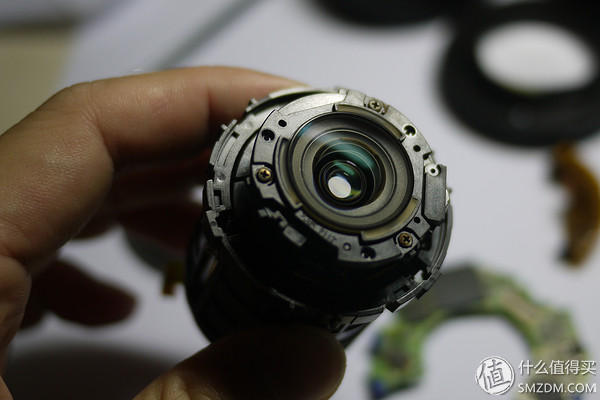
There is no obvious rust on the circuit board.
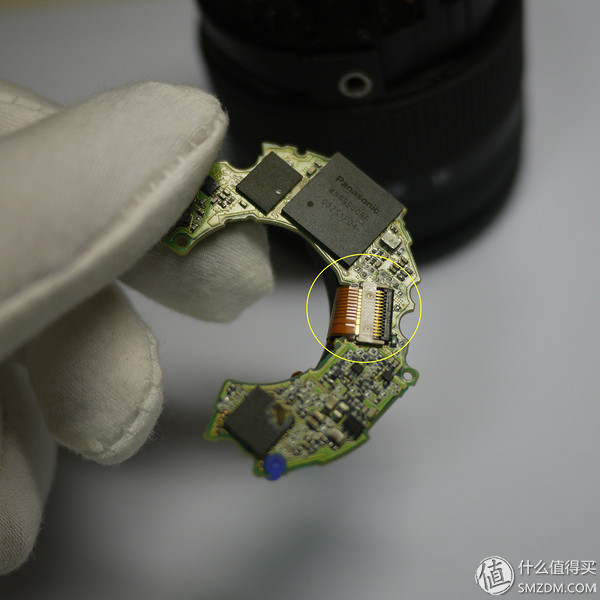
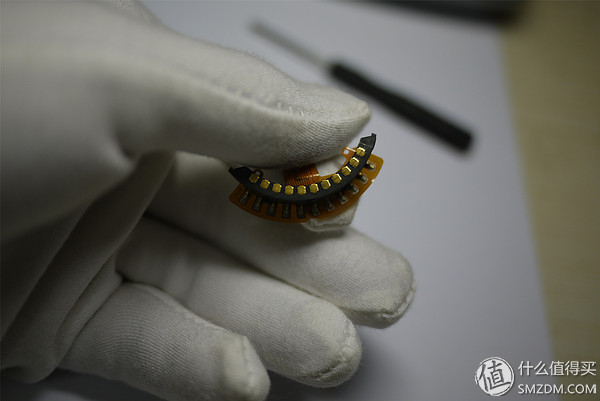
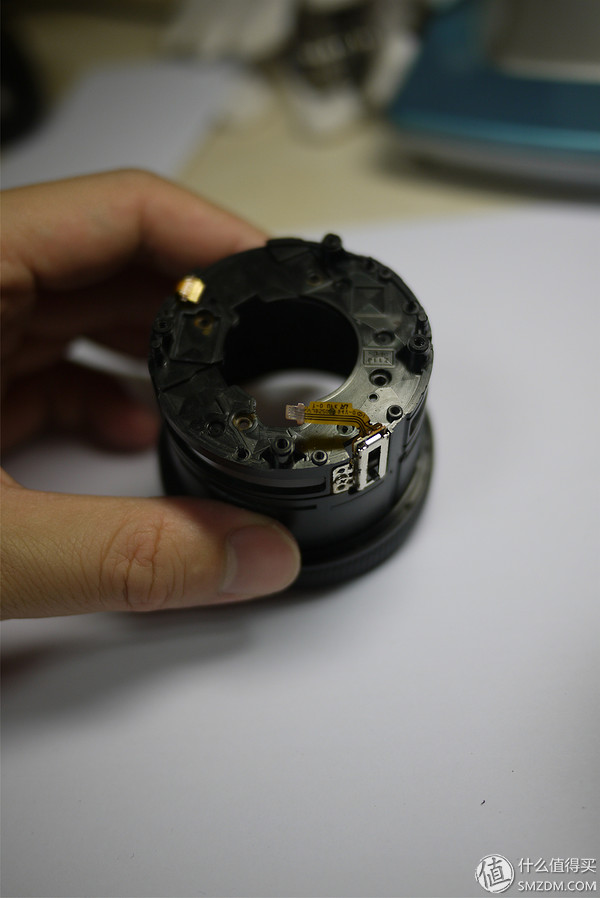
The back of the board is connected to the golden finger of the lens chrysanthemum. The biggest chip is Panasonic's own, but I don't know what it is for.
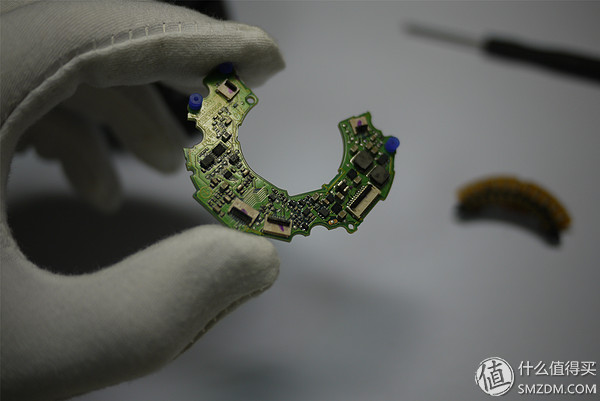
Turn over and look again.
Dentures.
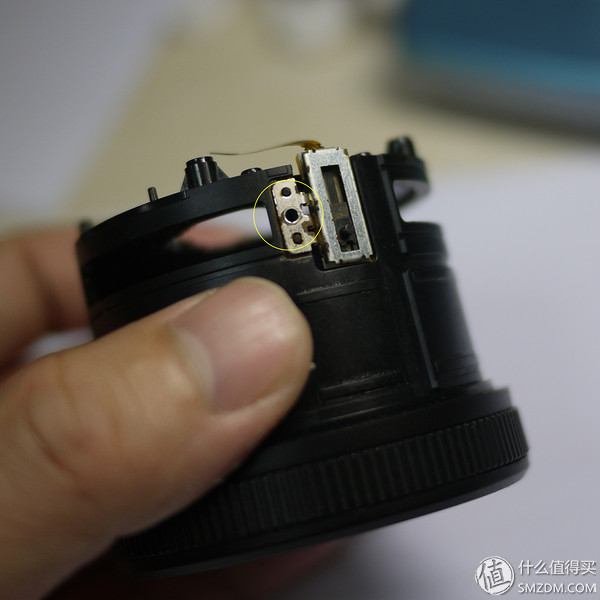
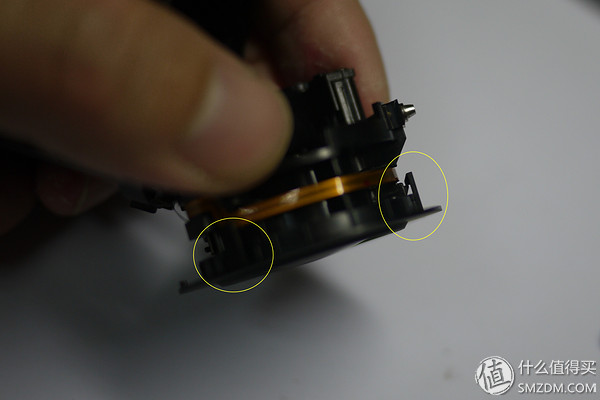
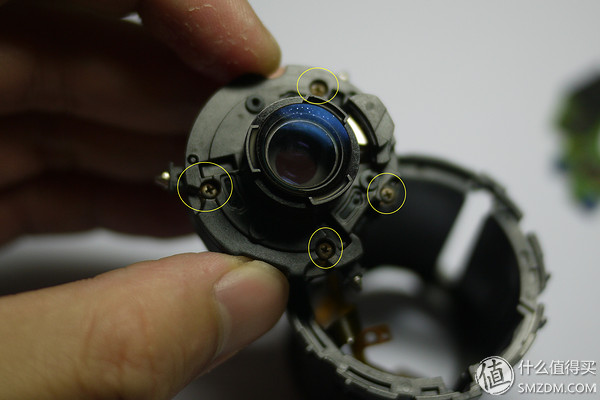
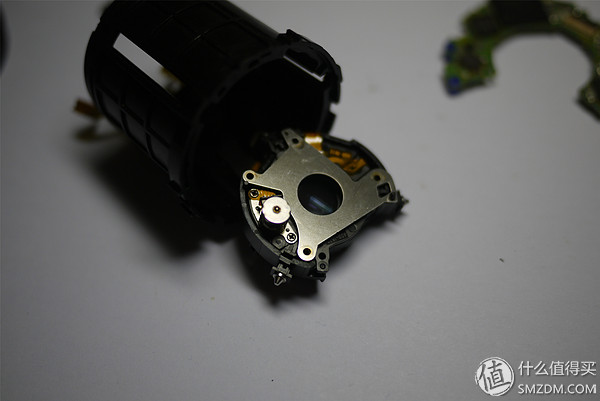
Continue to split. Remove the four screws.
The last time I took the card, I stuck at this step for a long time because I saw the other camera on the Internet and it looks like there is no such abnormal structure. It is this little silver metal ring. What is it for? Look down.
Remove the screws first and you can see that the corrosion is very serious. In fact, it is soaked in seawater, so it is only tens of seconds.

The answer was revealed to be used to smash the metal column. The loose pines in different directions are always not the right path, but I really can't think of any other way. There are a total of two such metal columns.

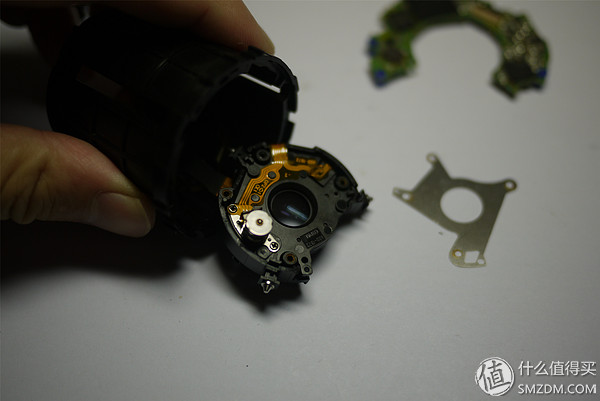
This is the zoom structure of the lens. The small protrusion sliding in the groove is connected to the circuit board through the cable. It should be a sliding resistor or something. It provides focal length information.

This is the telephoto end, next to another metal column.

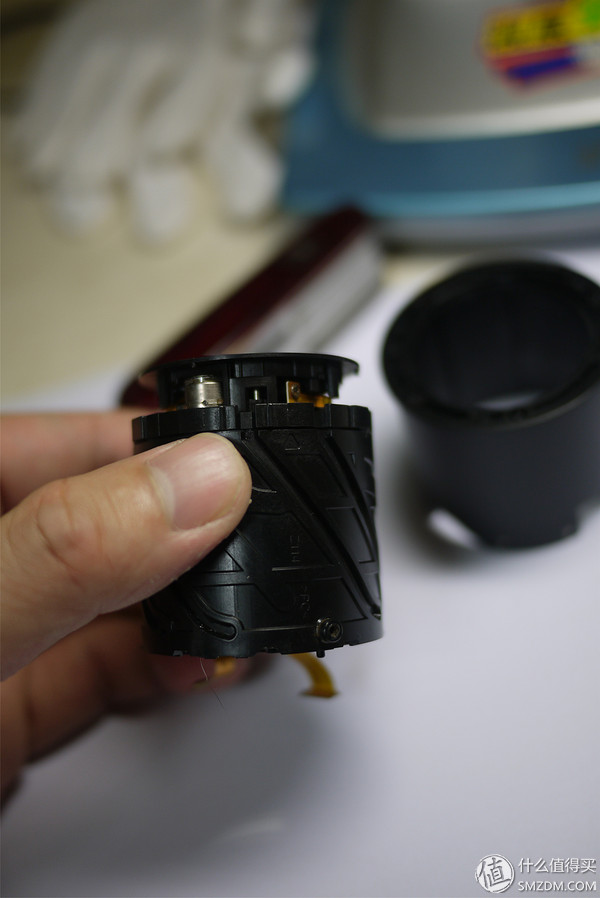
That's it...
Before blocking my culprit for a long time.

The barrel was taken down.
It is also a two-story structure that can be disassembled.
Rotate to far focus section and separate it up and down.

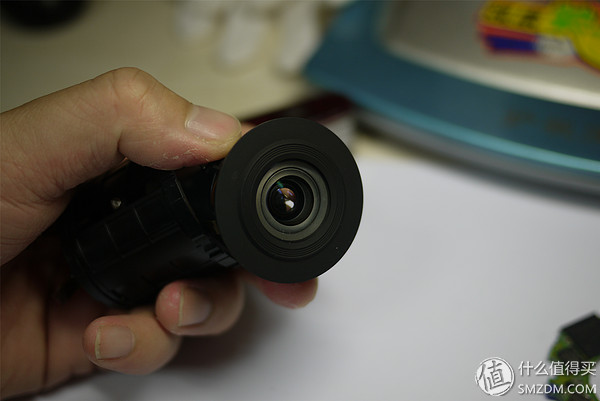
Fortunately, some pictures don't seem to have anything to describe. Let's take a look.
The screw has been removed by me and the location is marked.

Severe corrosion.

There is no rust remover at home, or you can try to clear it.

The following began to disassemble from the front lens group.

Remove adhesive stickers.

Three screws, easy to remove.

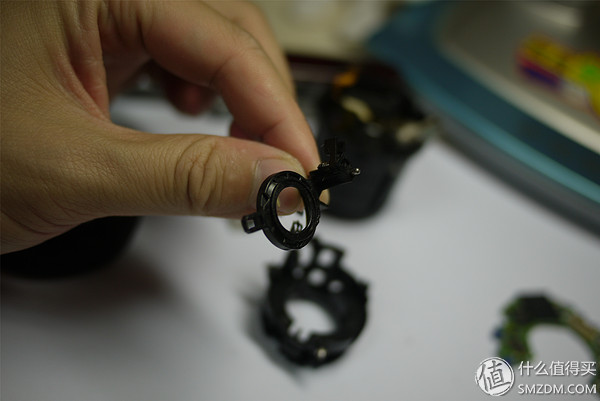
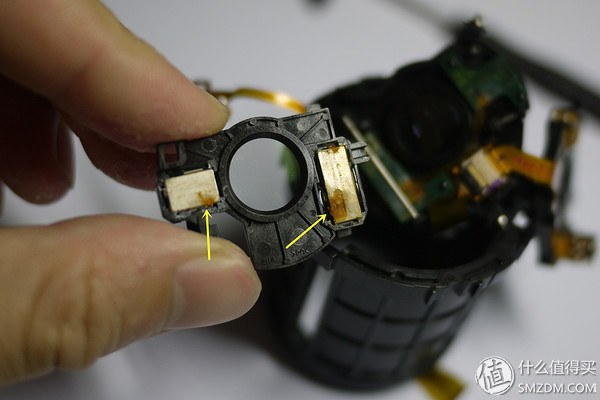
Remove the front lens. The inside of the lens should be coated, but it was wiped away by me last time (it was already spent). We will record the number of lenses by the way. This is the first one.

It is a magnifying glass.
Inside is numbered.

Two-layer mirror barrel, with a track on the outside of the inner barrel, can be removed by rotation.
Inside mirror barrel.

The inner wall of the outer barrel has metal particles corresponding to the outer track of the inner barrel.

Totem general texture...

There is also a layer inside... There are tracks inside and outside this layer.
Is this a lens endoscope?
Three hooks, one of which was blocked on the back. Gently lift to remove.

It is a plastic ring without lenses.
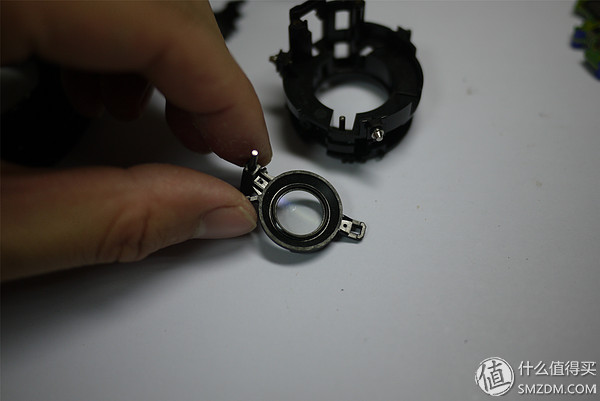
This is the real lens, leaving fingerprints...

In fact, the two lenses are stuck together, and they are flat after lordosis. Is this one or two? Temporarily remembered as the second piece.

Shrink the mirror.
Continue, many lenses...
This place has to be removed from this cable. There are four screws in three places.

By the middle one.

The place where the two screws are fixed is a small motor, which should be a focus motor.
Removed. The third piece.
This is where the motor is installed. Everybody can see that there is a metal rod as a slide rail, and the structure marked with a yellow circle can slide up and down.
This is sliding to the bottom.

Turn over to see this lens and sliding structure is one.

You can see where the contrast has changed. Use it to focus.

Remove the two screws.
Forgot to see if it's zoomed in or out...
This is the focus motor.
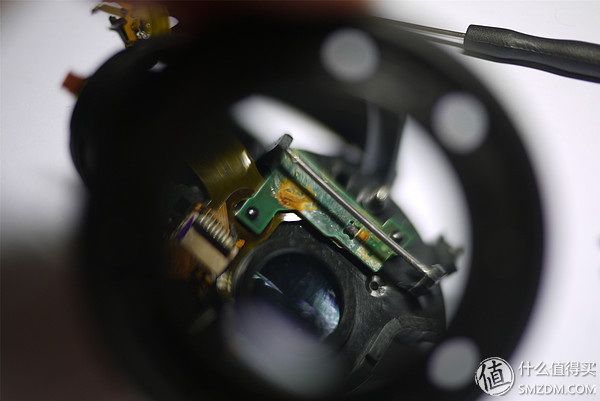
This lens is actually the last piece of the rear mirror group, that is, the lens at the daisy, because the cable can not be removed, but had to withdraw from the barrel and then turn it over. Three screws. This is the fourth film.

Like a top hat.
It is also a magnifying glass.
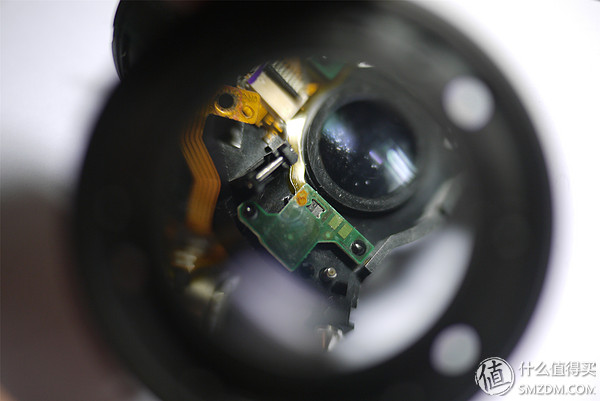
Slowly into the core part. Remove the four screws. The fifth piece.

Turning over and seeing, the black ring structure in the middle should be papery, and the arrows indicate six bonding points. This paper ring also made it impossible for me to clean the inner side of the front lens. I could only use a cotton swab to pack the lens paper into the middle of the paper ring.
Shrink the mirror.
See again a motor.

This structure opens and looks like an aperture. Because the screws are tight and then the screwdriver is of poor quality, this part is not disassembled further. However, it can be seen that the aperture is a 7-blade structure.

This part is the anti-shake structure of the lens.


The language is not very well described, so four photos were taken. As you can see, the position of the metal pillar changes within the box, which is actually the position change of the upper lens relative to the lower lens. The upper and lower parts are loosely secured together by several restraining devices.
Open to see two magnets, corrosion is very serious. The sixth film.
This is the lower structure, and the circuit board is also rusted. The seventh piece.
This is the back of the aperture section after disconnecting the cable.
With a magnifying glass, the metal rod is one of the limiting devices.
It is speculated that the anti-shake operation principle is to energize the lens with the magnet "suspended" in the air...
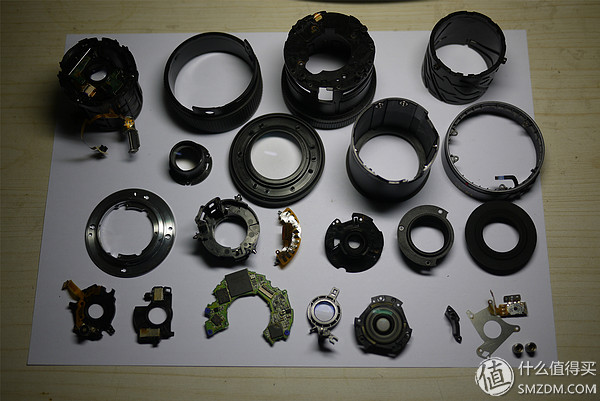
Well, in addition to the aperture inside, the other is completely opened, the family portrait. If this is not a photo record, it is really not to be loaded back.
I wiped it with lens paper and lens water, and then wiped it with a lens pen... it was much cleaner.
Like new...it's impossible.


Finally, two shots were taken out of the window. Everyone can see that it is indeed not good-looking, but it would have been raining today.
Do not look rust into the ghost look, the various functions of the lens, including electric functions are normal, but also quite magical. After installation, it is found that the lens still contains dust and traces left by the wipe. After all, it is not a professional environment and there is no way to do thorough cleaning.
Here I share with you a bit of personal experience. In fact, many electronic products do not short-circuit and burn out immediately after they enter or soak water. As long as they can be powered off for the first time, they should be cleaned (preferably with circuit board cleaning fluid). In the case of power off, pure water is also not a problem. Then it is thoroughly dried and it can basically continue to be used normally. The example is a Unicom contract version of the Samsung S4 mobile phone that was immersed in sea water at the time (and of course I myself, because it was a camera trousers in my neck and I slid in the shallow sea to slip into my neck...). Bulk, first soaked in the sun, and then serve normally. I also helped someone clean up a computer motherboard that had been on the strike. The CPU fan had too much lubricant. I left a direct short circuit everywhere. I dipped it with a toothbrush and used it to clean the oil. Then I drank it for two days. , full of blood and resurrection.
The following questions are coming. The online information shows that the lens is 9 sets of 12 mirrors. Why did I only find 7? (up to eight) know how to say wow.
This time the content is these, there are improper operation or what good cleaning methods are welcome to point out, thank you!